Monday, May 7, 2018

Another basement sash restoration

I restored the basement sash on the add on room built in 1923. This one was really bizarre. Unlike the other basement sash that opened in, this one opens out and there's a little room under there, bigger than a crawlspace but smaller than a proper basement - it has a lot of interesting things in there.

The sash had a broken pane which was covered over with plywood and the other pane was painted over. Very strange.
Sash removed
 
View of the frame with broken bits of glass all around.
The sash is freed
Back side, with wooden board across the width
Sash removed
Plywood is gone.
Robertson screws were used
Time to boil this paint-caked hardware to clean it up.
Glass removed and paint stripping began.
Strangely, the center muntin isn't jointed into the sash. It was just kind of there, and held in with 2 or 3 little nails that were really rusted which was causing the wood to get eaten away. I attempted to glue the muntin in place, but couldn't clamp tight enough, I had to settle for the nail method again since I'm not really that handy when it comes to joinery - I used galvanized nails and filled the gaps with glazing putty.
Time to clean up those hinges, removing the screws from the sash side was exceedingly difficult due to all the paint buildup, the white paint went easier.
Back side
I ended up replacing both panes of glass, I found that the painted pane actually had a missing chunk and they had gone overboard with glazing putty to patch, so I just replaced both panes. The pane was also exceptionally thick, something like 3/8 glass.
Window reinstalled, the lacquer got chipped up during reinstallation, so I had to touch it up afterward.
Sash reinstalled!
A few months later when the weather was warm enough to paint the sash frame, looks great now! Much better than everything being painted taupe like before!

Wednesday, May 2, 2018

Basement sash restoration

OK Guys, finally back to blogging and I've got a lot from the past little while that I've been absent.

I've done a couple of basement windows, and I'll be blogging on each of them.

This is one of the basement windows on the east side of the house, one of a few that retains original wood screens. I removed the screen to restore first, that way I could put the screen back on to remove the sash without letting bugs or critters into the basement.


Screen off - the window and frame are in rough shape likely not painted or glazed since the 80s.

Screen restored - didn't have to do much really except paint it.
 Note only 1 of the 4 strips that secures the screen to the frame retains the original cloverleaf molding, the rest were broken and replaced with plain strips of wood.
 The screen secures to the frame with 2 hooks, the eye screws are in the sash frame.

Some close ups of the before


Still before but with screen reinstalled

 I didn't really take much pics while working since I had also taken in progress pics when doing other basement sashes, this isn't the first one I did but it was the first one I decided to post about.

2 pics from "the workshop" excuse the mess.

I deglazed and stripped the paint, the left pane, where the cracked glass is I didn't have much success deglazing so I left it and just glazed around it. I spot glazed the cracks, not really the best option but I didn't want to replace the original wavy pane since it was just for the basement. I put some tape on the back to "stabilize" it - not really the best fix mind you. Also on the muntin, you can see spots where it becomes skinny, that's from a previous glaze job where a router was used to chew away the old putty which messed up the muntin and the glazing rabbet :(


Glazed them with sarco putty like all my other windows.

After the putty dried, I painted the sash and reinstalled it. Since I did this while it was cold I had to wait a few months for the weather to warm up to tackle painting the window frame.

I ended up hosing off the frame to get rid of all the loose paint chips, dust, plants and spider webs. I let it dry sufficiently, sanded it real good and gave the wood an all over with linseed oil-turpentine mix and let dry. Then I primed and painted.

  A world of difference, isn't it?
 Done, screen reinstalled.

Wednesday, December 27, 2017

Merry Christmas 2017

Wishing you all a very Merry Christmas 2017! Here's to a 2018

Updates coming soon (finally)

Tuesday, February 23, 2016

1876 Second Empire brick house

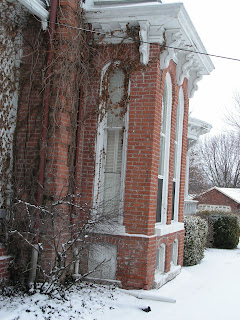
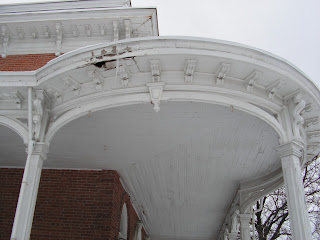
This 1876 Second Empire brick house is on the Historic Registry where I live nearby.

Enjoy.


I don't get whats with the section in the back here that is done with wooden clapboards instead of being brick.