Our back door features a transom window, which has been painted over and painted shut. The hardware aslo won't move from all the paint buildup (3-4 layers).
It also has a sheet of plywood with siding over it from the outside, so in essence, covered over.
There was also so much paint over the screws that I coudln't even get a screwdiver in there! I had to use chemical stripper over the screws to even be able to remove the hardware
I applied methylene chloride paint stripper to the glass, it was frankly the easiest paint I've ever stripped. 2 layers, one oil layer and a latex layer. (nail polish remover test)
A lot of it came away easy but like all paint stripping jobs, required repeat coats to get all the missed areas.
After a lot of scraping with a plastic putty knife and a hot soapy sponge with dawn to remove the white film left after the paint was removed, I ended up with this. 99% of the paint removed, there's still little bits I plan to carefully remove when the glass is out (don't want to put too much pressure on the glass when it's not on a flat surface) as I'm going to completely strip, restore and reglaze the transom and it's window/door frame.
I had to force a metal putty knife between the cracks and tap on it to force it in to break the paint seal. At last, this transom finally opens for the first time in.... how long?
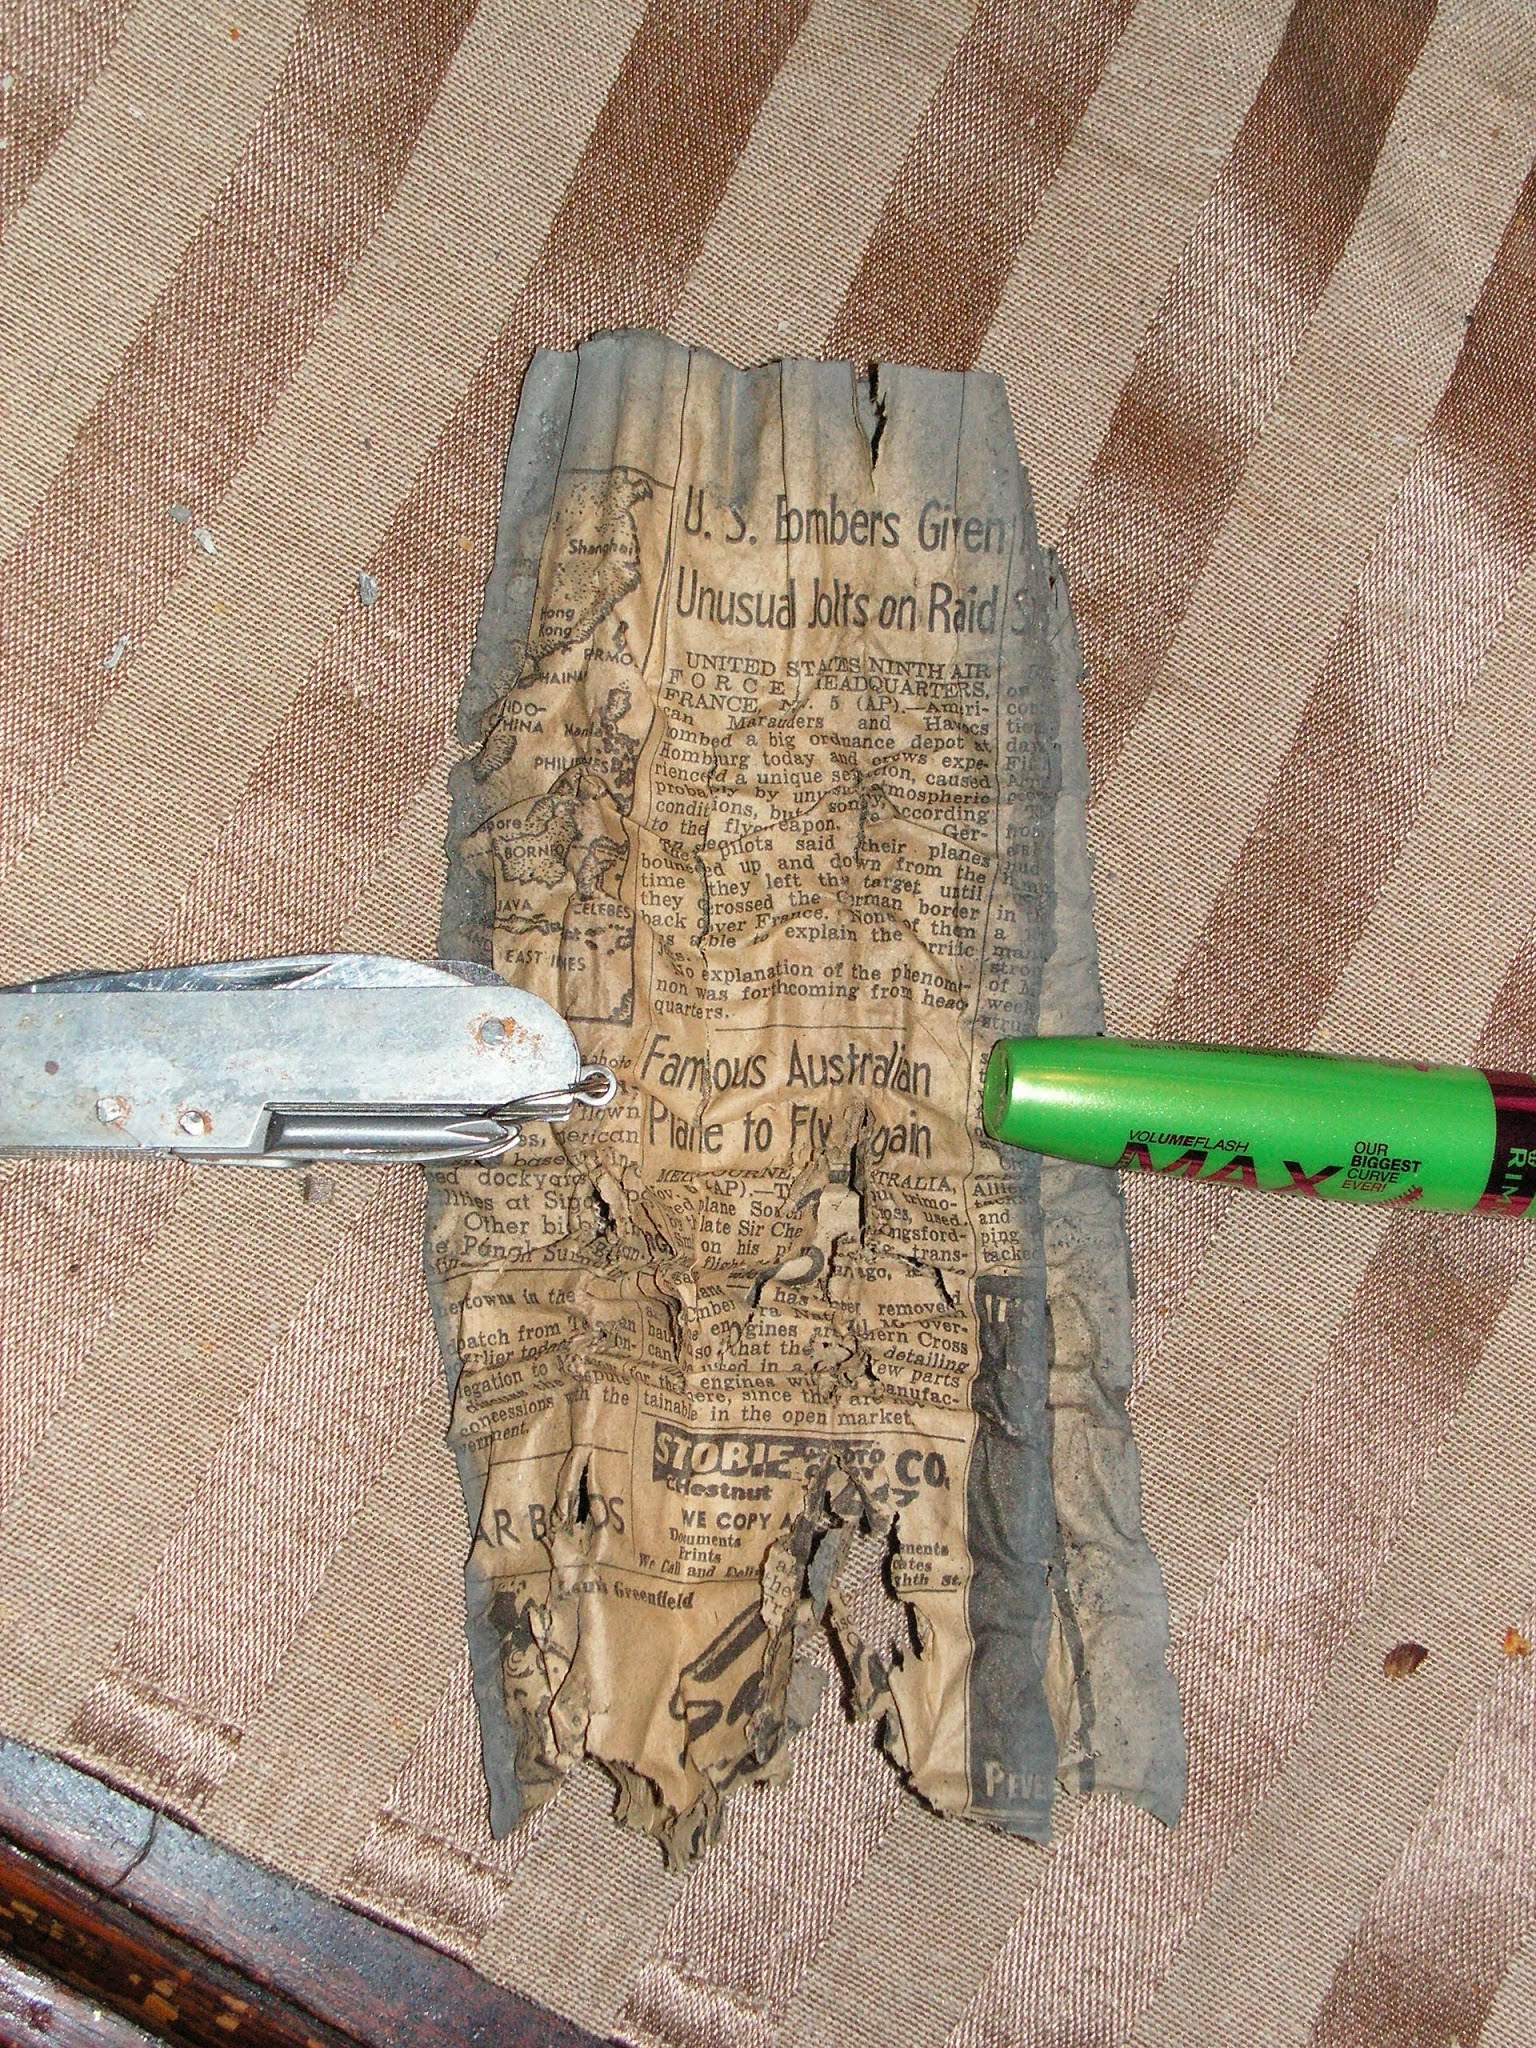
The bits of newspaper I found stuffed between the transom window after liberating it should shed some light on that question!
But first a shot of the other side of the transom, still painted black like it originally was (in our town, all the Victorian homes originally had black windows) - the white is spillover from other ways they attempted to seal the transom. There was also glazing compound in the crack between the transom and it's frame as well as tissue paper in addition to the newspapers in there, the white is from the paint that they painted over that aforementioned mass... Which no surprise, didn't stay together well.
Cobweb city has been uncovered!
All the putty is out of the bottom of the transom, which means rain water would just pour inside, possibly a reason they decided to seal it up since the knowledge the fix these things seems to be lost on most folk.
The plywood over the transom is nailed onto several shim boards they nailed into the transom's inner frame, so it's not nailed into the window or anything like that thankfully. That was another factor in why I wanted to remove the paint off the glass before attempting to remove the transom in case it was nailed into the window itself.
Now, onto those newspapers! They were all scrunched up like this, I carefully unfurled them the best I could without destroying them.
The first headline: U.S. Bombers Given Unusual Jolts on Raid
What have we here? Nov 6, 1944! So to answer the above question, this is the first time that transom has moved in almost 70 years! wow. I had figured the transom was sealed in the 60s by the PO before us. This places it back by 2 decades.
Some more shots of the newspapers for those interested in such things!
More on this in another blog post, since there was so much discovery, I decided to post this all now.
Well, in various parts of the basement, usually above bulkheads and around the windows under the living room, there were bits of old newspapers from between 1911 and 1925 and some as recent as 1950 or so.
I photographed many of these newspapers including closeups of various sections, I thought they might make for an interesting blog post.
I also noticed most of the newspapers are from around late December 1924 to new years 1925, I did some digging and found that in our area they were experiencing -25°F temperatures around that time! With December 28, 1924 (a date on of one of the papers in my pics had a record low of -24°F) Mystery solved as to why they decided after a quarter of a century to try to seal up the windows, not counting the single newspaper from 1911.
Most are from the St. Louis Globe-Democrat, which is a defunct newspaper outlet. Has quite a few interesting/pretty advertisements, more than a few for teeth pulling or some sort of tooth creams.
Unfortunately, some like the window below (which has the OLDEST of the bunch, from 1911) are over windows which I have to take out and re putty and I really don't want to destroy these newspapers to do it. They're so delicate (from the moisture) that if you touch them, they fall apart (the one pictured below I found in that state) Unless I can manage to properly reglaze them in situ.
The latest one, from around 1950, no date was spotted but on the reverse was an ad for a 1949 truck.
On the upstairs bathroom door, the hinge holes were more or less stripped and the door sagged quite a bit. I used the toothpicks and wood glue method to repair the holes.
I took ordinary toothpicks, put wood glue on them, jammed them into the hinge holes, hammered them into place, waited 24 hours then cut them flush with and sanded them.
The before, as you can see the top hinge hole is the most damaged
With toothpicks
Turns out this door has been a problem for a long time, back into the home's early history as every screw was a different length add to the fact that they're all antique flat blades.
The top hinge hole was the most damaged and I just had to keep putting so many toothpicks in there, as it seems someone tried to put a really long screw in at one point, which didn't work and I had to put so much in that hole, I wasn't able to screw the screw back into that hole, and not having a drill, I had to get creative and hammer a nail into the hole to make a pilot hole! Ever since then, the door no longer sags. I did this back in October/November of last year and it's been fine since then.
While not pictured, it turns out the sag was a problem even longer than I thought it was, because almost all the doors, especially this one had the bottom cut off making the door a trapezoid :( I can't believe anyone actually thought that was a solution for a sagging door, especially back then (because the doors that were taken off the hinges in the 30s/40s that were in the attic since that time also are trapezoidal).
Too bad they didn't know about this easy fix.
We have 2 of the C20 Rimlocks which when the knob would turn, nothing would happen and the latch would be stuck inside the lock, therefore those doors (one being a bathroom door) woudn't stay closed. They had broken leaf springs. After some difficulty, I managed to find a local locksmith who stocked spring steel on hand and we matched the piece in size/thickness and I cut them into the proper length and replaced the broken springs. Works like a charm!
The broken spring:
Once repaired
An original unbroken spring inside another lock. Notice it has a slight bend in the lower portion, I wasn't sure about how to bend spring steel and was afraid of breaking it, so I didn't put this same bend in the replacement spring. Seems to work fine though.