Our back door features a transom window, which has been painted over and painted shut. The hardware aslo won't move from all the paint buildup (3-4 layers).
It also has a sheet of plywood with siding over it from the outside, so in essence, covered over.
There was also so much paint over the screws that I coudln't even get a screwdiver in there! I had to use chemical stripper over the screws to even be able to remove the hardware
I applied methylene chloride paint stripper to the glass, it was frankly the easiest paint I've ever stripped. 2 layers, one oil layer and a latex layer. (nail polish remover test)
A lot of it came away easy but like all paint stripping jobs, required repeat coats to get all the missed areas.
After a lot of scraping with a plastic putty knife and a hot soapy sponge with dawn to remove the white film left after the paint was removed, I ended up with this. 99% of the paint removed, there's still little bits I plan to carefully remove when the glass is out (don't want to put too much pressure on the glass when it's not on a flat surface) as I'm going to completely strip, restore and reglaze the transom and it's window/door frame.
I had to force a metal putty knife between the cracks and tap on it to force it in to break the paint seal. At last, this transom finally opens for the first time in.... how long?
The bits of newspaper I found stuffed between the transom window after liberating it should shed some light on that question!
But first a shot of the other side of the transom, still painted black like it originally was (in our town, all the Victorian homes originally had black windows) - the white is spillover from other ways they attempted to seal the transom. There was also glazing compound in the crack between the transom and it's frame as well as tissue paper in addition to the newspapers in there, the white is from the paint that they painted over that aforementioned mass... Which no surprise, didn't stay together well.
Cobweb city has been uncovered!
All the putty is out of the bottom of the transom, which means rain water would just pour inside, possibly a reason they decided to seal it up since the knowledge the fix these things seems to be lost on most folk.
The plywood over the transom is nailed onto several shim boards they nailed into the transom's inner frame, so it's not nailed into the window or anything like that thankfully. That was another factor in why I wanted to remove the paint off the glass before attempting to remove the transom in case it was nailed into the window itself.
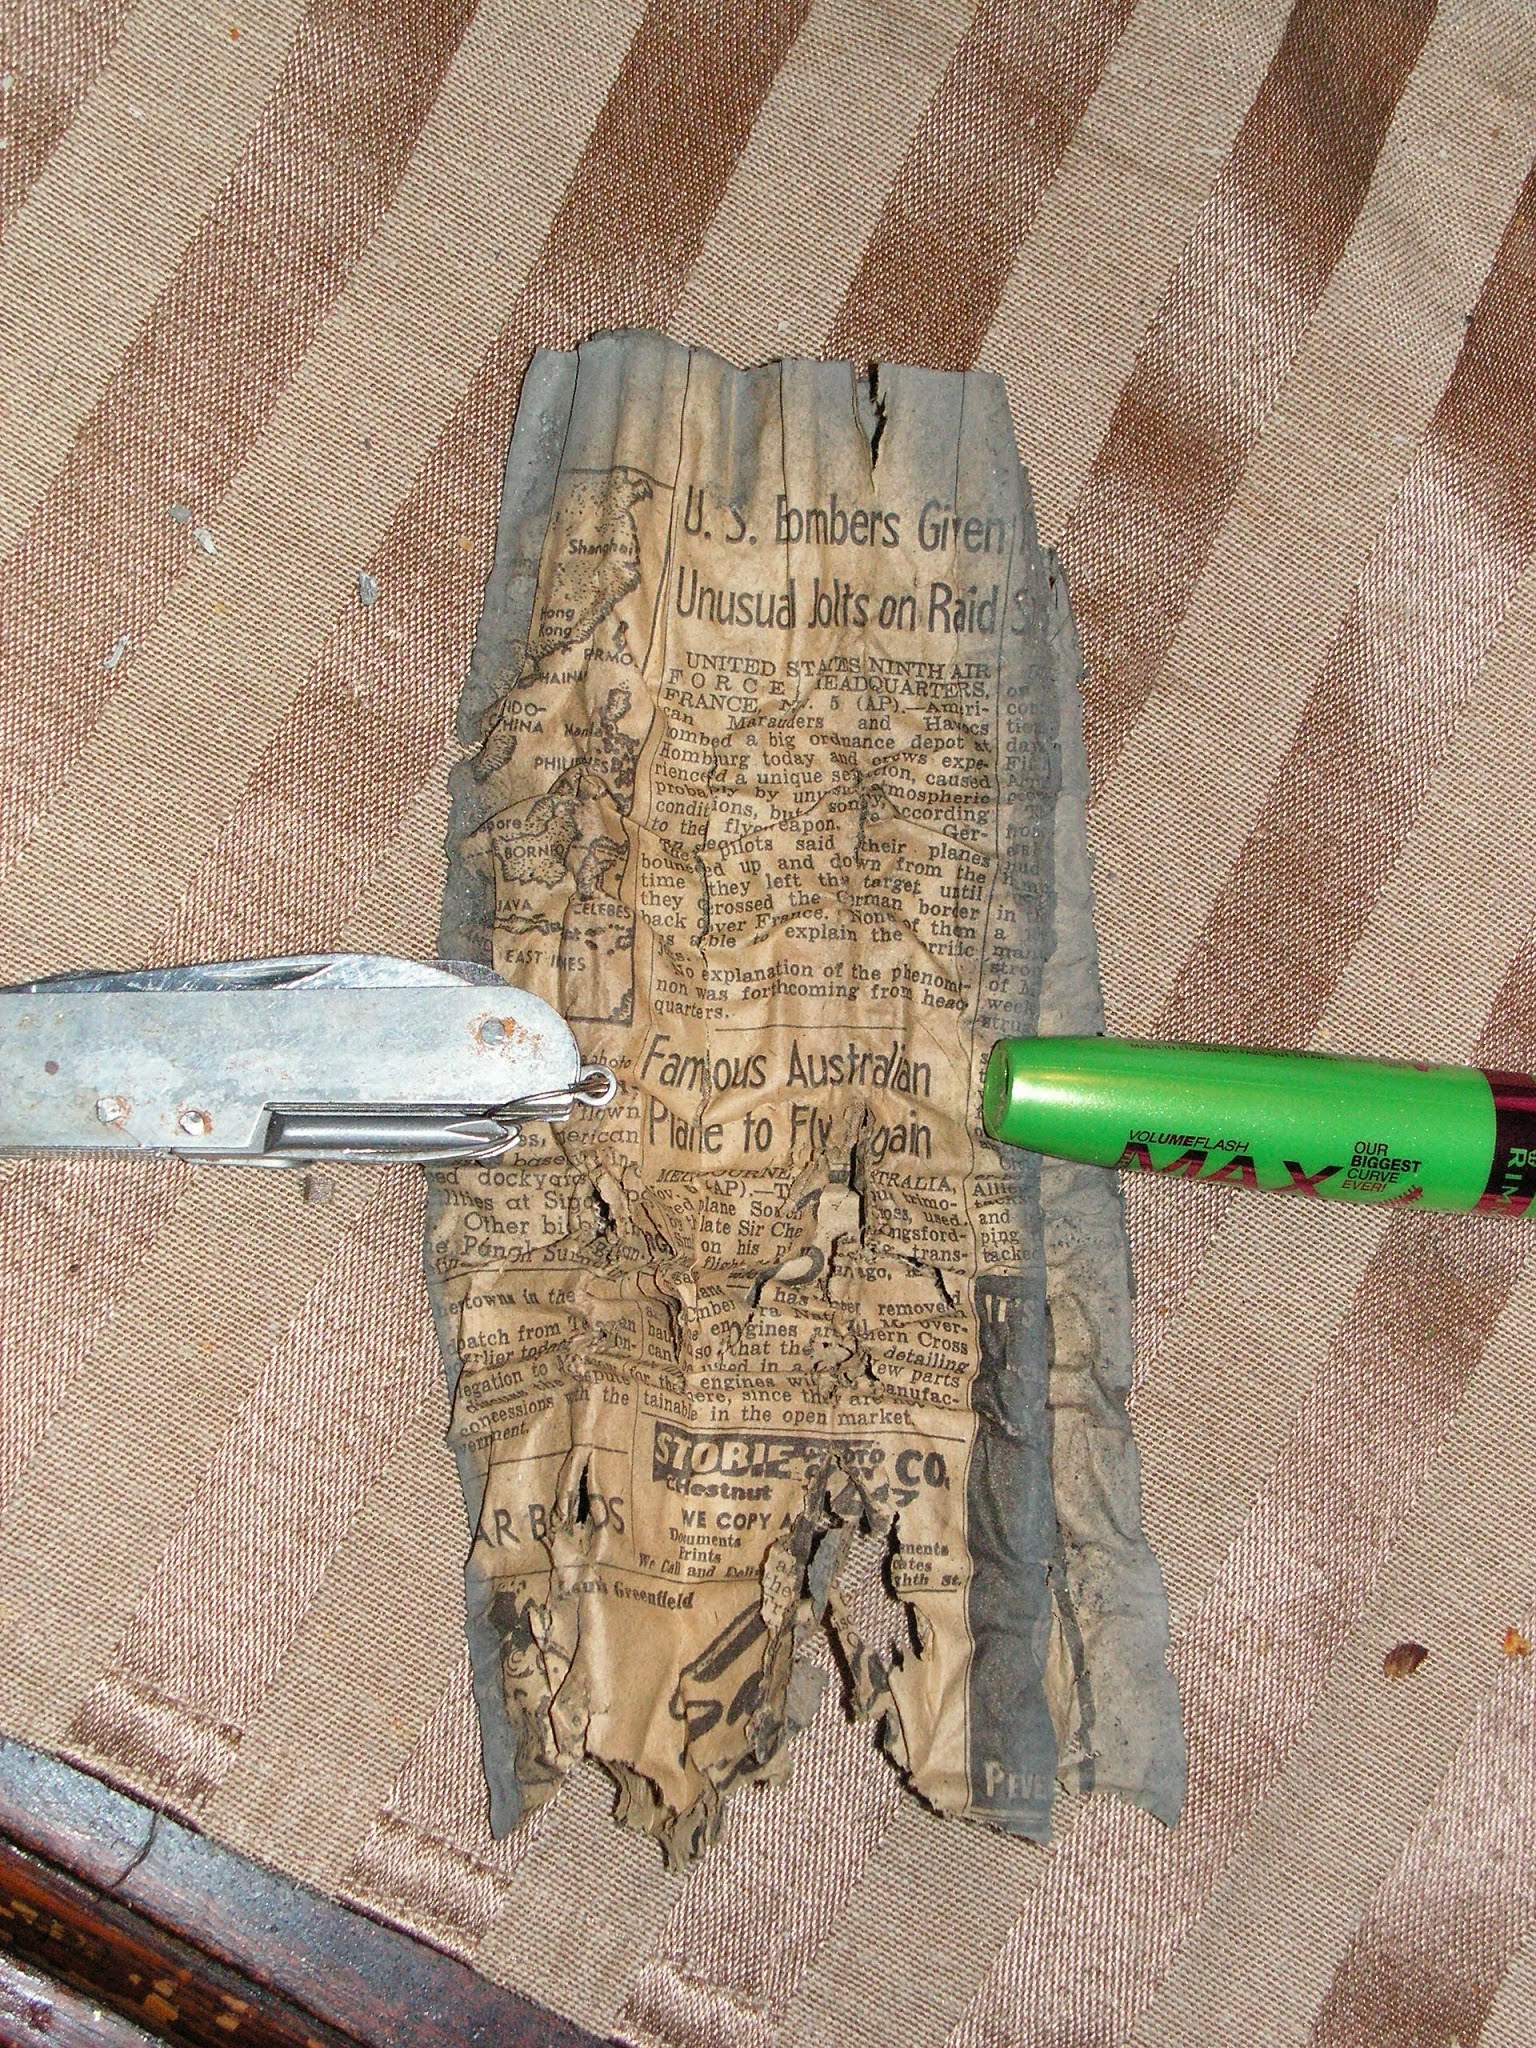
Now, onto those newspapers! They were all scrunched up like this, I carefully unfurled them the best I could without destroying them.
The first headline: U.S. Bombers Given Unusual Jolts on Raid
What have we here? Nov 6, 1944! So to answer the above question, this is the first time that transom has moved in almost 70 years! wow. I had figured the transom was sealed in the 60s by the PO before us. This places it back by 2 decades.
Some more shots of the newspapers for those interested in such things!
More on this in another blog post, since there was so much discovery, I decided to post this all now.
Well for the past few weeks I've been working in the upstairs bathroom stripping the paint off the door, door frames and window frame.
I managed to do most of the stripping with a heat gun, then I had to follow up on the stubborn spots with chemical stripper. I spent a long time picking out all the bits of paint from just about every corner imaginable with a utility knife tip. Then I sanded it with 100 grit, then again with 150 grit (220 grit was too fine) and then I gave it 2 coats of Minwax oil stain and used shellac to seal it. After sanding I used a rag with mineral spirits to remove the sanding dust.
BEFORE:
AFTER:
Unfortunately, the door and frames turned out a tad darker than I'd liked them to have turned out. The problem was I left the stain on a full 15 mins before wiping excess off both times, with the window, I did 15 mins, then 10 and it turned out just about right. The door isn't quite as dark as the photos make it out to appear, but it's a few shades darker than the rest of the wood.
I used Minwax Red Mahogany 225
As you can see below, the door's original color was on the dark side already. This door was only painted with latex, so it came off rather easily for the most part, I could pull entire strips up.
The door frame had a coat of oil paint and then latex over it. The original stain color of the door frames was lighter than the doors, I find this on many of our door frames. I would have liked to remove ALL the paint without chemical stripper (as it also removes the stain) as the original stain looked so nice.
But perhaps not, it seems a layer of the stain comes up with the paint so restaining would be necessary anyway.
Stripping paint off the window frame revealed there used to be a (I'm guessing) towel bar (there's 2 of those circular indentations) at some point in the past before this was ever painted. Then there is a second set of rectangular indentations of a later towel bar.
Also the paint shadowof casement window hardware and butterfly hinges before the original window was removed by the PO :(
On my project list is to restore the house to having wood heritage windows instead of modern windows - a little over half our windows were replaced with modern ones by the PO.
All the paint colors/layers. The green layer is a Victorian era paint color... Almost all the wood in the south part of the house is painted. I had wondered why for a long time, but after stripping this window frame I found that it had water damage... so it would seem the wood in the south section of the house was painted because of water getting in. This green paint was the toughest paint to remove of all. There were 3 coats, the green, a tan, and then the white latex paint on top.
As it was, only the window was painted at first, then someone came along and thought "since this is painted, might as well have the rest match" and sadly the rest was painted.
Unfortunately, the baseboards are not originals, but very close reproductions in wood and were directly painted, so with the heat gun I have, which won't remove paint from any wood that was originally painted, the baseboards had to stay white for now... Unless I can get a hold of something else to remove that paint, otherwise I have to leave them painted.
For some reason, the bathroom window sill had the corners cut off on the inside!?! I have no idea why this was done, and thankfully it's the only place where this was done and it was done long enough ago that it predated the very old, Victorian green paint layer.
The door after being fully stripped and sanded
The door frame after sanding (I did some more sanding after this to get it all even)
Unfortunately, some paint in the crevices between the door molding and frame molding coudln't be removed, but thankfully the stain covered over it pretty well and it ended up looking really sharp. That extra white molding around which I didn't strip was modern wood which like the baseboards was originally painted and woulnd't strip. It was put when they drywalled this bathroom (I have no idea why, just about everywehre else in the house is still plaster thankfully) and the drywall wasn't as deep as the plaster so they added those to hide the gap - I do plan to replaster it someday as I simply loathe drywall.
Staining the door
First coat is completed. I wish I wiped the second coat sooner as this color was so close to what I wanted.
I need to bring down the original closet door from the attic and strip and refinish it sometime.. the closet had a hollow core foldout door which I have removed.
I used Zinsser bulls eye clear shellac
The contents were really dark until I stirred it, then it turned light
Shellac on the door (this is about the actual color of the door, which isn't too bad when the lighting doesn't make it look almost black)
The window frame with all the paint stripped
I used Elmer's stainable wood putty on the gouges and areas that had holes
This is the window sill part that was water damaged, the wood could just be dug our with your finger. I sanded it down until I got to better wood.
The window after 2 coats of stain, this time I left the first coat for 15 mins, then wiped, 2nd coat for 10 mins then wiped it off. I shellaced everything and am really loving the restored wood!
BONUS pic:
A view from the attic at the original bathroom plaster walls and ceiling since they dropped the ceiling by a foot. I do plan to restore it all original someday. I do like that all the old ceilings were painted, I absolutely hate white ceilings of today. The worthless vent which they dropped my ceiling to put in, doesn't even work!!


